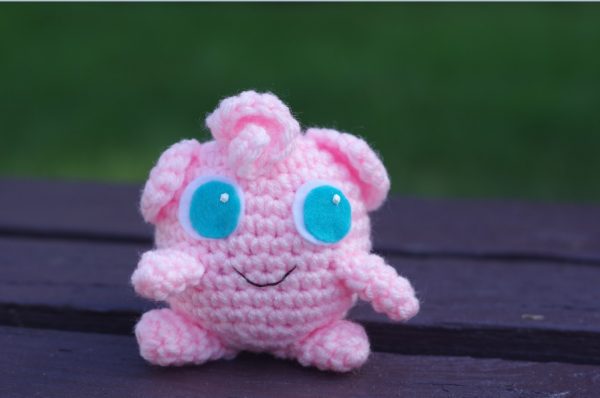
Jigglypuff – Crochet Pokemon {Free Crochet Pattern}
Jigglypuff
Anastasia Popova
Free crochet pattern for a Jigglypuff Pokemon amigurumi. There is a lot of crochet patterns for Jigglypuff online but I wanted the curl to look different.
Skills Required:
- Basic stitches (single, double crochet, slip stitch)
- Adjustable ring
- Increases
- Decreases
- Crocheting in the round
- Basic sewing
Finished Measurements: About 5″ tall and wide.
Yarn: Worsted weight yarn in pink.
Hook: US size G/6 (4.25 mm). Or hook necessary to obtain gauge.
Notions: Yarn needle; white and blue felt; white puffy paint; black sewing thread and needle. Glue gun for attaching eyes (optionally sew the eyes on with thread and needle instead).

Gauge: 16 sts and 15 rows = 4″ in single crochet.
Note on gauge: Gauge is not crucial for this project, stitches should be tight for stuffing not to show through.
Pattern Instructions
Body
Make an adjustable ring.
Rnd 1: 5 sc into the ring, pull tail to tighten the ring – 5 sts.
Rnd 2: 2 sc in each st around – 10 sts.
Rnd 3: (Sc in next st, 2 sc in next st) around – 15 sts.
Rnd 4: (Sc in next 2 sts, 2 sc in next st) around – 20 sts.
Rnd 5: (Sc in next 3 sts, 2 sc in next st) around – 25 sts.
Rnd 6: (Sc in next 4 sts, 2 sc in next st) around – 30 sts.
Rnd 7-12: Sc in each st around.
Rnd 13: (Sc in next 4 sts, sc2tog) around – 25 sts.
Rnd 14: (Sc in next 3 sts, sc2tog) around – 20 sts.
Rnd 15: (Sc in next 2 sts, sc2tog) around – 15 sts.
Rnd 16: (Sc in next st, sc2tog) around – 10 sts.
Stuff with fiberfill
Rnd 17: Sc2tog around – 5 sts.
Fasten off, leaving 10″ yarn tail. Add more fiberfill if necessary.
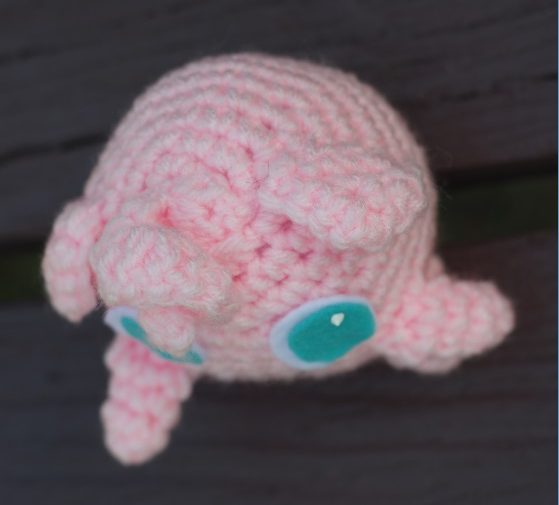
Curl
Ch 9, (sc, hdc) in 3rd ch from hook, 2 hdc in next st, 2 dc in next 2 sts, 3 dc in next st, (dc, htr) in next st, (htr, tr) in next st. Fasten off.
Ears (Make two)
Ch 2.
Row 1: 2 sc in 2nd ch from hook, turn – 2 sts.
Row 2: Ch 1, sc in 1st st, 2 sc in next st, turn – 3 sts.
Row 3: Ch 1, sc in 1st st, sc in next st, 2 sc in next st – 4 sts.
Work 8 sc evenly across two sides of the ear. Fasten off.
Arms (make two)
Make an adjustable ring.
Rnd 1: 4 sc into the ring, pull tail to tighten the ring – 4 sts.
Rnd 2: Sc in each st around.
Rnd 3: (Sc in next st, 2 sc in next st) twice – 6 sts.
Rnd 4: Repeat rnd 2.
Fasten off.
Feet (Make two)
Make an adjustable ring.
Rnd 1: 7 sc into the ring, pull tail to tighten the ring – 7 sts.
Rnd 2-6: Sc in each st around.
Finishing
With yarn needle and yarn tails using the picture as a guide sew the curl, arms, and feet onto the body (I did not stuff mine). Weave in the ends. Cut up eyes from felt and attached to the body either with the glue gun or sew on. Embroider mouth.
Written pattern copyright Anastasia Popova 2016, all rights reserved. Please do not reprint or repost this pattern, but please do link to this page to share this pattern with others.
Tags: crochetforbaby, crochetpokemon, free crochet pattern, freecrochetpattern, pokemon
Trackback from your site.